


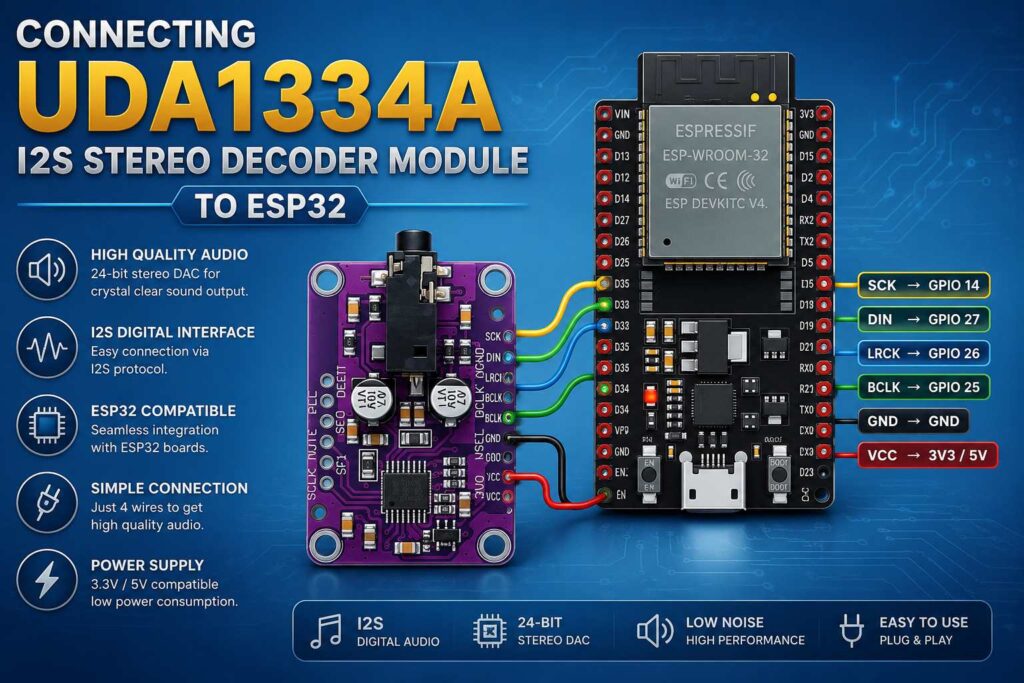
Connecting UDA1334A I2S stereo decoder module to ESP32
In smart home devices such as smart speakers and smart audio systems, Hi-Fi level is often used to describe their audio performance. These devices typically feature high-quality audio decoders, audio amplifiers, and high-fidelity audio components, providing a more realistic, clear, and detailed music performance, resulting in a better listening experience for users. In this post, we will use the UDA1334A stereo decoder module to restore audio signals.
Required components
- ● ESP-WROOM-32 ESP32 Development Board
- ● UDA1334A I2S Stereo Decoder Module
● Jumper
- UDA1334A I2S Stereo Decoder Module Introduction
The UDA1334A is a versatile digital-to-analog converter (DAC) renowned for its exceptional audio performance. Its key feature is its ability to deliver high-fidelity sound reproduction, making it a top choice for audio enthusiasts and professionals alike. The DAC supports a wide range of sampling frequencies, ensuring accurate and detailed audio playback.

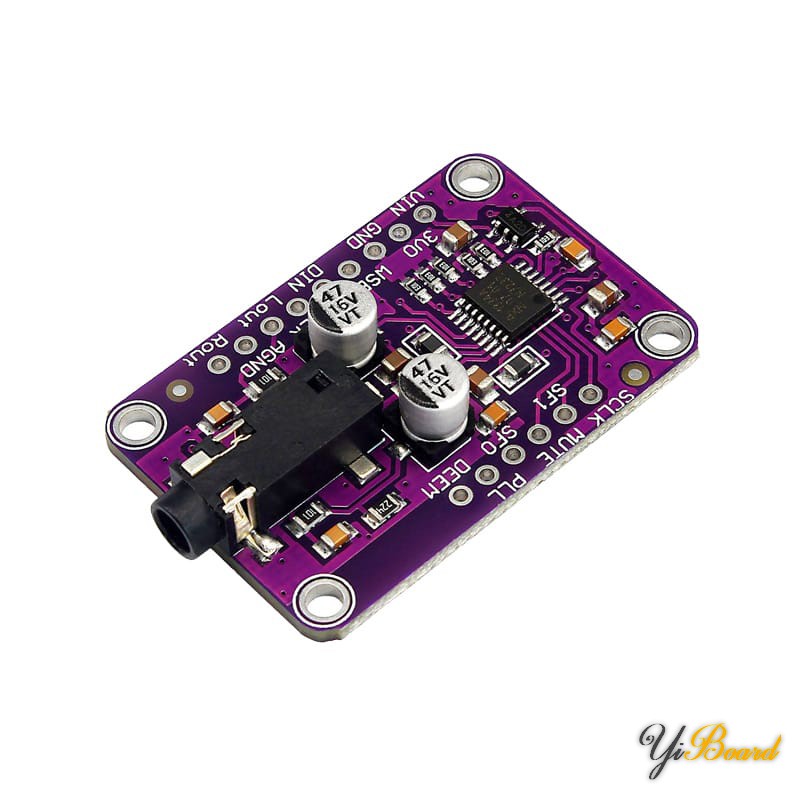
Pin layout of the UDA1334A decoder module
The UDA1334A module has 14 pins, as shown in the figure below:

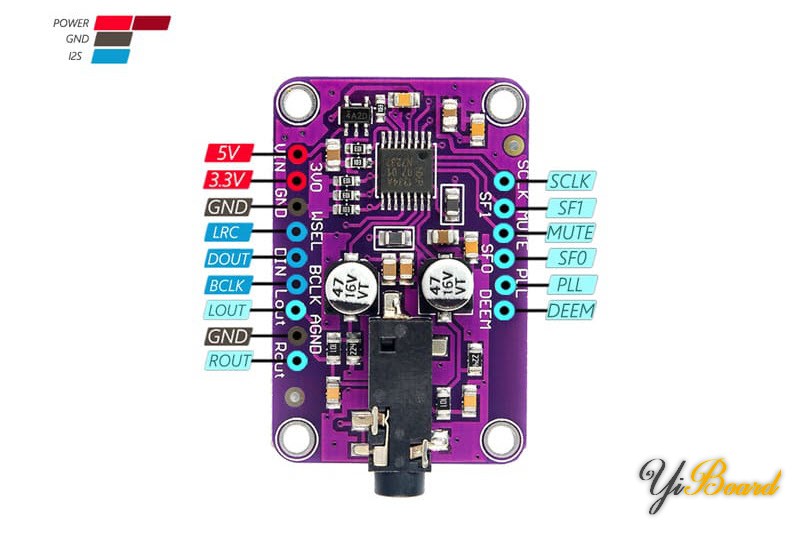
- ● 5V : Power input (5V)
- ● 3.3V : Power input (3.3V)
- ● GND : IC’s ground reference
- ● LRC (Left/Right Clock) : Input used for left/right channel recognition
- ● DOUT (Data Out) : Serial data output used to transmit the converted analog signal.
- ● BCLK (Bit Clock) : Input used for synchronizing data transmission
- ● LOUT (Left Channel Output) : Analog audio output for the left channel.
- ● AGND (Analog Ground) : Ground used for internal analog reference.
- ● ROUT (Right Channel Output) : Analog audio output for the right channel.
- ● SCLK (System Clock) : Input used for system clock synchronization
- ● SF0 and SF1 (Digital Filter Select) : Inputs used to select digital filter options. SF0 and SF1 are used to set the input data format. By default, both are pulled low for I2S, but you can change them to obtain other formats.
- ● MUTE : Input for muting audio output
- ● PLL (Phase-Locked Loop) : Input used for external clock synchronization
- ● DEEM (De-emphasis) : Input used for de-emphasis control
Hardware connection
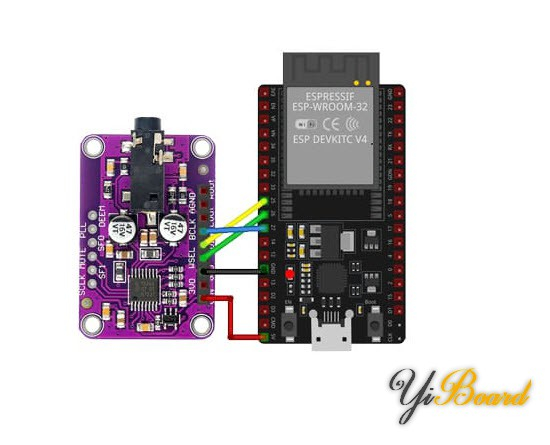
Connect the ESP32 development board to the UDA1334A module as shown in the following figure:

code
First, install the ESP32-audioI2S library on the Arduino IDE: https://github.com/schreibfaul1/ESP32-audioI2S .
Then upload the following code to your ESP32 development board.
//**************************************************************************************************
//* audioI2S-- I2S audiodecoder for ESP32, *
//**************************************************************************************************
//
// First release on 11/2018
// Version 3, Jul.02/2020
//

#include "Arduino.h"
#include "WiFiMulti.h"
#include "Audio.h"
#include "SPI.h"
#include "SD.h"
#include "FS.h"

// Digital I/O used
#define SD_CS 5
#define SPI_MOSI 23
#define SPI_MISO 19
#define SPI_SCK 18
#define I2S_DOUT 25
#define I2S_BCLK 27
#define I2S_LRC 26

Audio audio
WiFiMulti wifiMulti;
String ssid = "xxxxx";
String password = "xxxxx";


void setup() {
    pinMode(SD_CS, OUTPUT); digitalWrite(SD_CS, HIGH);
    SPI.begin(SPI_SCK, SPI_MISO, SPI_MOSI);
    SPI.setFrequency(1000000);
    Serial.begin(115200);
    SD.begin(SD_CS);
    WiFi.mode(WIFI_STA);
    wifiMulti.addAP(ssid.c_str(), password.c_str());
    wifiMulti.run();
    if(WiFi.status() != WL_CONNECTED){
        WiFi.disconnect(true);
        wifiMulti.run();
    }
    audio.setPinout(I2S_BCLK, I2S_LRC, I2S_DOUT);
    audio.setVolume(12); // 0...21

// audio.connecttoFS(SD, "/320k_test.mp3");
// audio.connecttoFS(SD, "test.wav");
// audio.connecttohost("http://www.wdr.de/wdrlive/media/einslive.m3u");
// audio.connecttohost("http://macslons-irish-pub-radio.com/media.asx");
// audio.connecttohost("http://mp3.ffh.de/radioffh/hqlivestream.aac"); // 128k aac
      audio.connecttohost("http://mp3.ffh.de/radioffh/hqlivestream.mp3"); // 128k mp3
}

void loop()
{
    audio.loop();
    if(Serial.available()){ // put streamURL in serial monitor
        audio.stopSong();
        String r=Serial.readString(); r.trim();
        if(r.length()>5) audio.connecttohost(r.c_str());
        log_i("free heap=%i", ESP.getFreeHeap());
    }
}

// optional
void audio_info(const char *info){
    Serial.print("info "); Serial.println(info);
}
void audio_id3data(const char *info){ //id3 metadata
    Serial.print("id3data ");Serial.println(info);
}
void audio_eof_mp3(const char *info){ //end of file
    Serial.print("eof_mp3 ");Serial.println(info);
}
void audio_showstation(const char *info){
    Serial.print("station ");Serial.println(info);
}
void audio_showstreamtitle(const char *info){
    Serial.print("streamtitle ");Serial.println(info);
}
void audio_bitrate(const char *info){
    Serial.print("bitrate ");Serial.println(info);
}
void audio_commercial(const char *info){ //duration in sec
    Serial.print("commercial ");Serial.println(info);
}
void audio_icyurl(const char *info){ //homepage
    Serial.print("icyurl ");Serial.println(info);
}
void audio_lasthost(const char *info){ //stream URL played
    Serial.print("lasthost ");Serial.println(info);
}
After uploading, the ESP32 will establish a connection with the broadcast server and begin playing the song.